The Ultimate Guide to Wood Burning Stoves
Wood-burning stoves have become increasingly popular in recent years and for a good reason. They offer a warm and cosy atmosphere in any home, and they can also be a cost-effective, carbon-neutral heating solution. We will cover everything you need to know about wood-burning stoves, including installation requirements, availability, and potential savings.
Table of Contents
Wood Burning Stoves Installation Requirements
Before installing a log burner stove, there are several requirements that need to be considered.
First, you’ll need to ensure that you have a suitable location for the stove, with adequate space and ventilation.
Secondly, you’ll also need to ensure that your chimney is in good condition and can handle the heat generated by the stove. If you do not have an existing chimney, a twin wall flue system would be required. Occasionally, you may need to obtain building permits or adhere to local regulations. It is important to do your research before beginning the installation process.
The stove manufacturer and local building codes determine the recommended space (clearances) around a stove. Clearances are essential to ensure proper ventilation, prevent heat damage to nearby materials, and reduce fire risk. Failure to do so can result in heat damage, fire, or carbon monoxide poisoning.
If you have any more questions about installing a log burner stove, please get in touch with us. We are more than happy to offer our expertise.
Wood Burning Stove for Sale
Because of the nature of the product, we do not sell our wood-burning stoves online. At our Glasgow showroom, we offer a wide variety of log-burning stoves to suit any home decor or heating needs. We offer traditional designs as well as modern stoves and we can also help you choose the right size and model for your home.
Brands: Clock Stoves, Stovax Stoves, Varde Ovne Stoves, Burley Stoves, HETA Stoves, ESSE Stoves, and many more
Can wood-burning stoves lower energy costs?
One of the main benefits of installing a wood-burning stove is the potential savings on your heating bills. Unlike traditional central fossil heating systems, wood-burning stoves use renewable energy sources, such as logs, pellets, or chips. This means that you can save money on your heating bills while also reducing your carbon footprint.
Types of Wood Burning Stoves
There are several types of wood-burning stoves available on the market, each with its own unique design and features. Here are some of the most common types:
Traditional or Classic Stoves
These stoves have a timeless design. They are often made from cast iron or steel, creating a warm and cosy atmosphere in any home.
Contemporary or Modern Stoves
These stoves come in sleek and modern designs. They are usually made from steel and are perfect for those looking for a more minimalist look.
Inset or Insert Stoves
These stoves are designed to be fitted into an existing fireplace or smaller opening, allowing you to enjoy the benefits of a wood-burning stove while still maintaining the aesthetic of your fireplace.
Available materials for Wood Burning Stoves
Wood-burning and Multi-Fuel stoves are available in a variety of materials, each with its own advantages and disadvantages. Below are some of the most common materials used in wood-burning stoves and their pros and cons:
Cast Iron Stoves
Cast iron is a popular material for wood-burning stoves due to its durability and classic look. Cast iron stoves can also retain heat well, making them efficient at heating a room after the fire has gone out. However, they can be heavy and may take longer to heat up than stoves made from other materials.
Steel Stoves
Steel wood-burning stoves are lightweight and durable, making them easy to move. They heat up quickly, which means they can start providing warmth almost immediately. Steel stoves do not retain heat well after the fire has gone out.
Soapstone Stoves
Soapstone is a natural stone that is often used in wood-burning stoves due to its ability to retain heat well. Soapstone stoves are also known for their unique and attractive appearance. However, soapstone is a relatively soft material, which means it can crack or chip over time.
Stove Installation Enquiries
If you’re interested in installing a wood-burning stove in your home, we encourage you to visit our Glasgow showroom. We have a variety of stoves on display to allow you to envisage how they would look in your own home.
If you prefer to look online, visit our wood-burning stoves page. Here, you can find more information about our products and services, as well as make enquiries about stove installations. Our team of experts is always available to answer any questions you may have about the perfect stove for your home.
In conclusion, wood-burning stoves are an excellent heating solution for any home. They offer a warm and cosy atmosphere, potential savings on your heating bills, and are environmentally friendly.
Wood Burning Stoves FAQs
How does a log-burning stove work?
- A wood-burning stove works by burning wood to create heat, which is then radiated out into the room. The heat from the stove can be controlled by adjusting the airflow into the firebox.
What type of wood should I use in my wood-burning stove?
- Dry, seasoned hardwoods such as oak, maple, and cherry are best for use in a wood-burning stove. Avoid using softwoods like pine, as they contain high levels of resin, which can cause creosote buildup in the stove and chimney.
Do I need a chimney for my wood-burning stove?
- A chimney is required for a wood-burning stove to vent the smoke and gases produced during combustion. If you don’t have a traditional brick built chimney then you would require to have a twin wall flue system installed.
How often do I need to have my chimney swept?
- It’s recommended that you clean your chimney at least once a year, preferably before the heating season starts. However, you may need to clean it more frequently depending on how often you use it.
Can I install a wood-burning stove myself?
- No, it is not recommended to install a wood-burning stove yourself. The installation process can be complex and requires knowledge of building codes and regulations. You must have a professional installer for installation and a HETAS registered fitter will have the knowledge required for safe installation.
How much heat can a wood-burning stove produce?
- The amount of heat produced by a wood-burning stove depends on its size and the type of wood being burned. Generally, a stove can produce anywhere from 3kw to 11kw. We can help calculate the correct heat required for your room.
Are wood-burning stoves environmentally friendly?
- Wood-burning stoves can be a sustainable and environmentally friendly heating option when used correctly. However, it’s important to ensure that the stove is Ecodesign approved and that you are using dry, seasoned wood to minimize emissions.
Are there any safety precautions I need to take when using a wood-burning stove?
- Yes, it’s important to follow safety precautions when using a wood-burning stove, such as keeping flammable materials away from the stove, using a fireproof hearth and installing a carbon monoxide detector.
How much does it cost to install a wood-burning stove?
- The cost of installing a wood-burning stove can vary depending on factors such as the type of stove, the complexity of the installation, and the location. It’s best to get a quote from a professional installer to determine the cost.
How To Install Wall Panels
Wall panels evoke style and create character within any home. From the grandest of Victorian and Edwardian properties to modern minimal new builds, wall panels can give your interior the wow factor.
Our collection of wall panels will give your walls an instant lift and enrich your space with either decorative or simplistic mouldings. Finished with a white primer, our mouldings are easy to install and ready for that final touch of paint in order to reflect the existing colour palette of your room.
In this article, we will show you how to create and fit a wall panelling effect using our panel mouldings. We will also highlight the tools you will require and how to apply adhesives.
Before you start glueing panels to your interior walls, we recommend storing your panels and adhesives at room temperature and waiting 24 hours before installation. We promise you’ll get the best results this way!
What You Will Need
Everything you need in order to install wall panels correctly is listed below.
- Measuring tape
- Protractor
- Pencil
- Mitre box & saw
- Whether you use a compact box, Variomatic mitre box or large wooden mitre box, you’ll achieve the same results so don’t panic over choosing which mitre box to use.
- Adhesives
- Caulking gun
- Protective equipment including a face mask, gloves and overalls
- Dado Rails
Step By Step Guide To Create A Wall Panel Effect
Our dado rails have endless design opportunities and can be used to create a variety of panel styles including a floor-to-ceiling panel effect. For example, our SX157 panels have been used to create this beautiful and elegant panel design.
Before you start, make sure your wall surfaces are flat, dust free, sanded down and grease-free. If you can tick the above off your checklist, you’re good to go!
Step 1 – Prepare your working area
Before you start fitting your dado rails onto the wall, protect your floors and lay tarpaulin down or a plastic sheet. This isn’t a necessity but it helps with the final clean up plus, you’ll be relieved that your flooring is still in good condition and dust free after your DIY efforts.
Step 2 – Measure and mark your walls
Our dado rails often come in 2-metre lengths therefore you’ll need to decide how high you’d like the panels to sit and the style of paneling you wish to create before making any markings. Once you’ve decided on the style and height, take your measuring tape and start marking up your walls. This will give you an indication of the lengths of dado rails you will need in order to create a panel effect.
In order to create a rectangular wall panel effect as shown in the image above, you’ll need 4 panels with 2 different lengths. Each of these panels will need to be cut at a 45-degree angle at the top and bottom of the rail in order to allow these panels to join and create the rectangular panel effect. Please see the example below for reference.
After you’ve got your measurements, we’d recommend marking the rest of your walls with tape or light pencil marks as a design guide. This will allow for easier installation as you are just sticking the panels on top of your original markings.
Step 3 – Cutting your panels
Once you’ve got your measurements, make sure you set the mitre box to the right angle size and direction. Place your dado rails into the mitre box and start cutting!
For every panel make sure you repeat the steps mentioned above to ensure your dado rails match your measurements.
Top tip: Make sure you secure the panels into the mitre box to avoid disruption and movement during sawing. This will ensure a clean and smooth finish.
Once you’ve got all your panels cut, check that the corner pieces fit together before fixing them to the wall.
Step 4 – Choosing your adhesives
Orac dado rails/wall panels are made of a lightweight duropolymer therefore no screws are required to fit your panels to the wall. There are various adhesives available to fit Orac wall panels and you’ll need two adhesives to create your final look – one to fix the panels to your existing wall structure, and one to join two wall panels together for example, for joints and corners.
We’ve listed three Orac adhesives that you could choose from. Each adhesive comes in various sizes in order to meet the needs of your project.
- Decofix Pro adhesive – for use on interior walls and panel mouldings
- Decofix Power – for use on heavier profiles, non-porous surfaces, and in bathrooms
- Decofix Extra – for use on corners and moulding joints
Step 5 – Application of adhesives
- Open your adhesive, attach the nozzle and as per the instructions, insert the canister into your caulking gun.
- Pick your dado rail and apply the adhesive to the back of the panel areas that directly touch the wall. Be consistent with your application. Apply the glue across the entire stretch of the panel, do not apply in blobs.
- Firmly, press the panel design onto the wall, ensuring you work along the length of the entire rail.
- An excess adhesive may spill out the sides of the moulding, don’t be alarmed, this is normal. Remove the overspill with a spatula and damp cloth to ensure a clean finish across your walls.
If you’re more of a visual learner, we’ve got you covered, we’ve attached Orac’s step-by-step video below. This takes you through every step and shows you exactly what you need to do in order to create that detailed wall panel effect you’ve been longing for.
View our full range of ‘wall panels‘.
Christmas Holiday & Online Ordering Times
Our Glasgow showroom will be closing for Christmas holiday at 4pm on Thursday 14th December and shall re-open on Wednesday 3rd January.
Online orders will still be dispatched as normal up until 20th December and will resume from 2nd January.
We will have access to emails during the holiday period and will do our very best to respond to any that we can so if you have any questions, or need us to check stock prior to placing your order, please email sales@wmboyle.co.uk.
Please see delivery schedule below and please allow plenty of time for pre-Christmas ordering.
Orders received up until 10am on 20th December will be dispatched if the items are in stock.
Once your order is with the carrier, the normal delivery time is 1-3 working days (except Highland & Islands.) We must stress that we cannot guarantee pre-Christmas delivery dates especially for orders placed between 18th-20th December. Once orders have been processed and dispatched, you will receive a delivery email with your tracking information.
Please bear in mind that our website is not stock managed so if you wish to check stock availability, prior to placing your order, please email us and we will respond quickly.
We would like to wish all of our customers a wonderful Christmas and a Happy New Year.
Best wishes from Collette, Patricia and all the team.
How to Fit & Put Up Coving & Cornice
Installing coving is a fantastic way to create a lovely finish for any room and conceal the edge between the wall and ceiling. We’ve created a simple yet detailed DIY guide to help you with the installation and cutting of our lightweight coving to create those lasting finishing touches to your interior.
Our lightweight range of cornices and covings are available in varying sizes and designs that can suit your home’s unique interior décor. We have styles to suit all homes from small coving for modern built properties to larger cornices for traditional period homes. We have step-by-step video guides for cutting coving, showing you how to carefully mitre and install the internal and external corners of coving.
Fortunately, you don’t have to bring in a professional to help you with fitting your coving. Often it can be a relatively simple task that can be undertaken as a DIY project, with it being installed quickly and easily.

Modern lighting coving
Whatever size of coving you choose, the installation and cutting of internal and external coving mitres is done in exactly the same way. Our installation guides and videos are designed to help you fit your coving with ease and achieve the best possible finish. We also sell all the adhesives, mitre boxes & tools required for your job.
Read on for a simple guide on how to fit your coving and cornice.
What Will You Need?
You will require the following items to fit your coving without any issues:
- Measuring tape
- Lengths of coving
- Adhesive
- Sandpaper
- Mitre Box
- Spirit level
- Chalk line
- Panel pins
- Filler
- Hammer
How to Install Coving & Cornice
Step 1: Protect Your Floor
Before you start fitting your coving it helps to protect your floor by laying tarpaulin or a plastic sheet. You could also wear protective gloves to protect your hands and stay safe. These are more precautionary than absolutely necessary.
Step 2: Mark the Wall
Marking lines are required to be added to the wall and ceiling so it’s clear where the coving should be placed. To find out where these should be, read the instructions from the manufacturers as they will provide exact measurements.
If for example the coving should be placed 83mm down the wall and 83mm onto the ceiling (measured from where the ceiling and wall meet) then carry out the measurements and add marks to the wall at these points at roughly one metre intervals. Once complete, use an object with a straight edge to join them (a spirit level would be useful here).
A chalk line can also be used. After the measurements have been carried out and the marks added onto the wall and ceiling, lightly hammer in a panel pin at one end of the wall on one of the measurement marks. Then carefully wrap the chalk line around the panel pin and extend it to the other end of the wall which you have already marked. Double check that your chalk line is lined up accurately and whilst it is pulled fairly tight snap it back in place against the wall. This will give you a clear mark across the wall that will serve as your guideline for fitting the coving.
Step 3: Hammer in Panel Pins
Once you have a clear guideline, hammer in your panel pins every 35/40 centimetres along the chalk line (making sure to check for any pipes or cables beforehand). You should also ensure that the cut section of your coving is in place to ensure proper fitting.
Step 4: Apply the Coving Adhesive
Take your adhesive and apply it carefully to the back of your coving along the edges. You don’t have to apply the adhesive at the centre of the coving since it won’t come in contact with any surface.
Step 5: Fit Your Coving
Carefully lift coving onto the top of your panel pins that you hammered into the wall in step 3 and push it firmly. Make sure that it is in a straight line and nothing gets out of your chalk line.
Step 6: Tidy the Edges
Take your time to get rid of the excess adhesive on the coving. You can accomplish this step using a damp piece of cloth and a palette knife.
Step 7: Apply Filler
Once you have removed the excess adhesive, apply a thick bead of filler to the bottom and top edges of the coving. Use a damp sponge to smooth the filler so that your edges remain clean.
Step 8: Sand the Filler
Allow your filler some time to dry up. Once it has dried up, you can use sandpaper to sand it until it is entirely smooth.
Cutting Coving and Cornice Corners & Mitres
Cutting coving and cornice corners and mitres is slightly trickier however it is still definitely achievable without having to get the professionals in.
For this step, it helps if you have a mitre box. We have 3 different mitre boxes to suit all sizes of coving which are ideal for cutting internal and external corners.
The videos below provide step by step instructions on how to cut the internal and external corners of coving and cornice.
How to cut internal coving/cornice corners
How to cut external coving/cornice corners
If you need to stop the coving before a staircase slope or you just need to stop at one end then you need to cut a stop end mitre. The video below demonstrates how to do this.
How to cut a stop end mitre
ORAC have also produced their own how to install lightwight coving and cornice guide which provides images and further information regarding cutting coving, alongside which adhesive is best for your job.
If you’re looking to upgrade or replace broken coving, view our own selection of lightweight coving & decorative cornices.
Stove & Fireplace Sale
Our New Year sale has now started with discounts off all fireplace and stove orders. We also have some lovely ex-display models which are being sold to make way for new designs. Visit our Glasgow fireplace and stove showroom to view our range and discuss your requirements. We can arrange full installation service throughout Glasgow and many other areas.
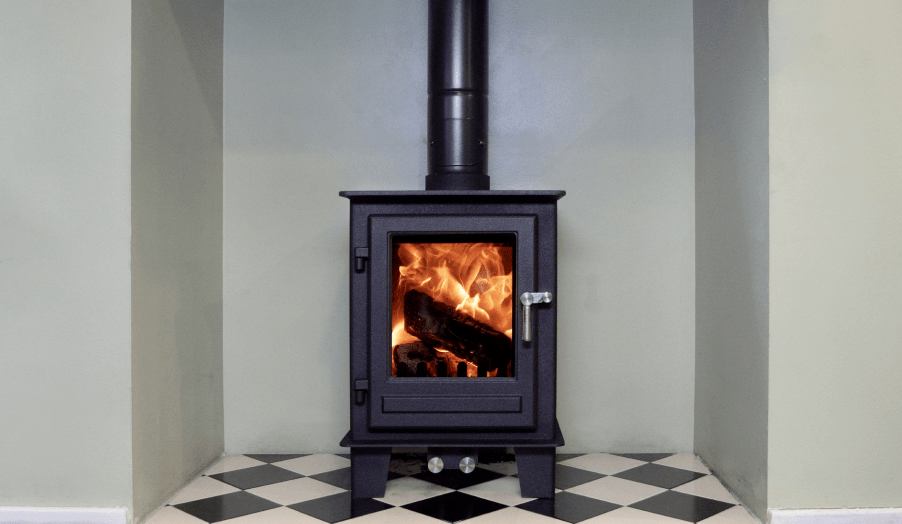
Asquith with Clock stove
Stovax Sheraton Stove
Tiree Fireplace with Gotham 900 Electric Fire

Patrick limestone fireplace with Gotham 600 electric fire
Glasgow Stoves & Fireplaces
The heating season is nearly upon us yet again and we have been busy making some changes to the showroom. We have some lovely new stove displays including the Clock stove with black & white tiled hearth and the Heta Inspire 40 with the Paris white painted surround. Our new modern designs include the Patrick stone fireplace with Gotham electric fire and the Tiree Portuguese limestone fireplace with Gotham 900 electric fire.
Fireplaces are making a big comeback and we have noticed that more people are wanting a proper mantlepiece, particularly with stoves. Getting the right size for your room is important and many of the older, more traditional properties, around Glasgow need a decent size of surround to suit the proportions of the rooms. Most of our wooden, stone and marble surrounds can be adjusted in size so we can have them made to suit your individual requirements.
If you are in a modern built home with no chimney, we have some lovely new designs which can be installed against a flat wall with either electric or balanced flue gas fires.
We believe that a fireplace or stove is a great investment for your home and we pride ourselves that we spend time and money to ensure that our showroom has the right products for you to see. Ordering stoves and fireplaces online or choosing from an Ipad is just not the same as seeing the items in the flesh. Our installation teams cover all of Glasgow and surrounding areas so give us a call or pop into showroom to have a chat.
View our entire collection of Fireplaces & Stoves here.
New Product News
We have had such a busy start to the year and everyone is looking forward to the Easter break. If you are planning updates to your home then there are some fantastic new products available in our lightweight range so we thought we would do a little spotlight on them for you.
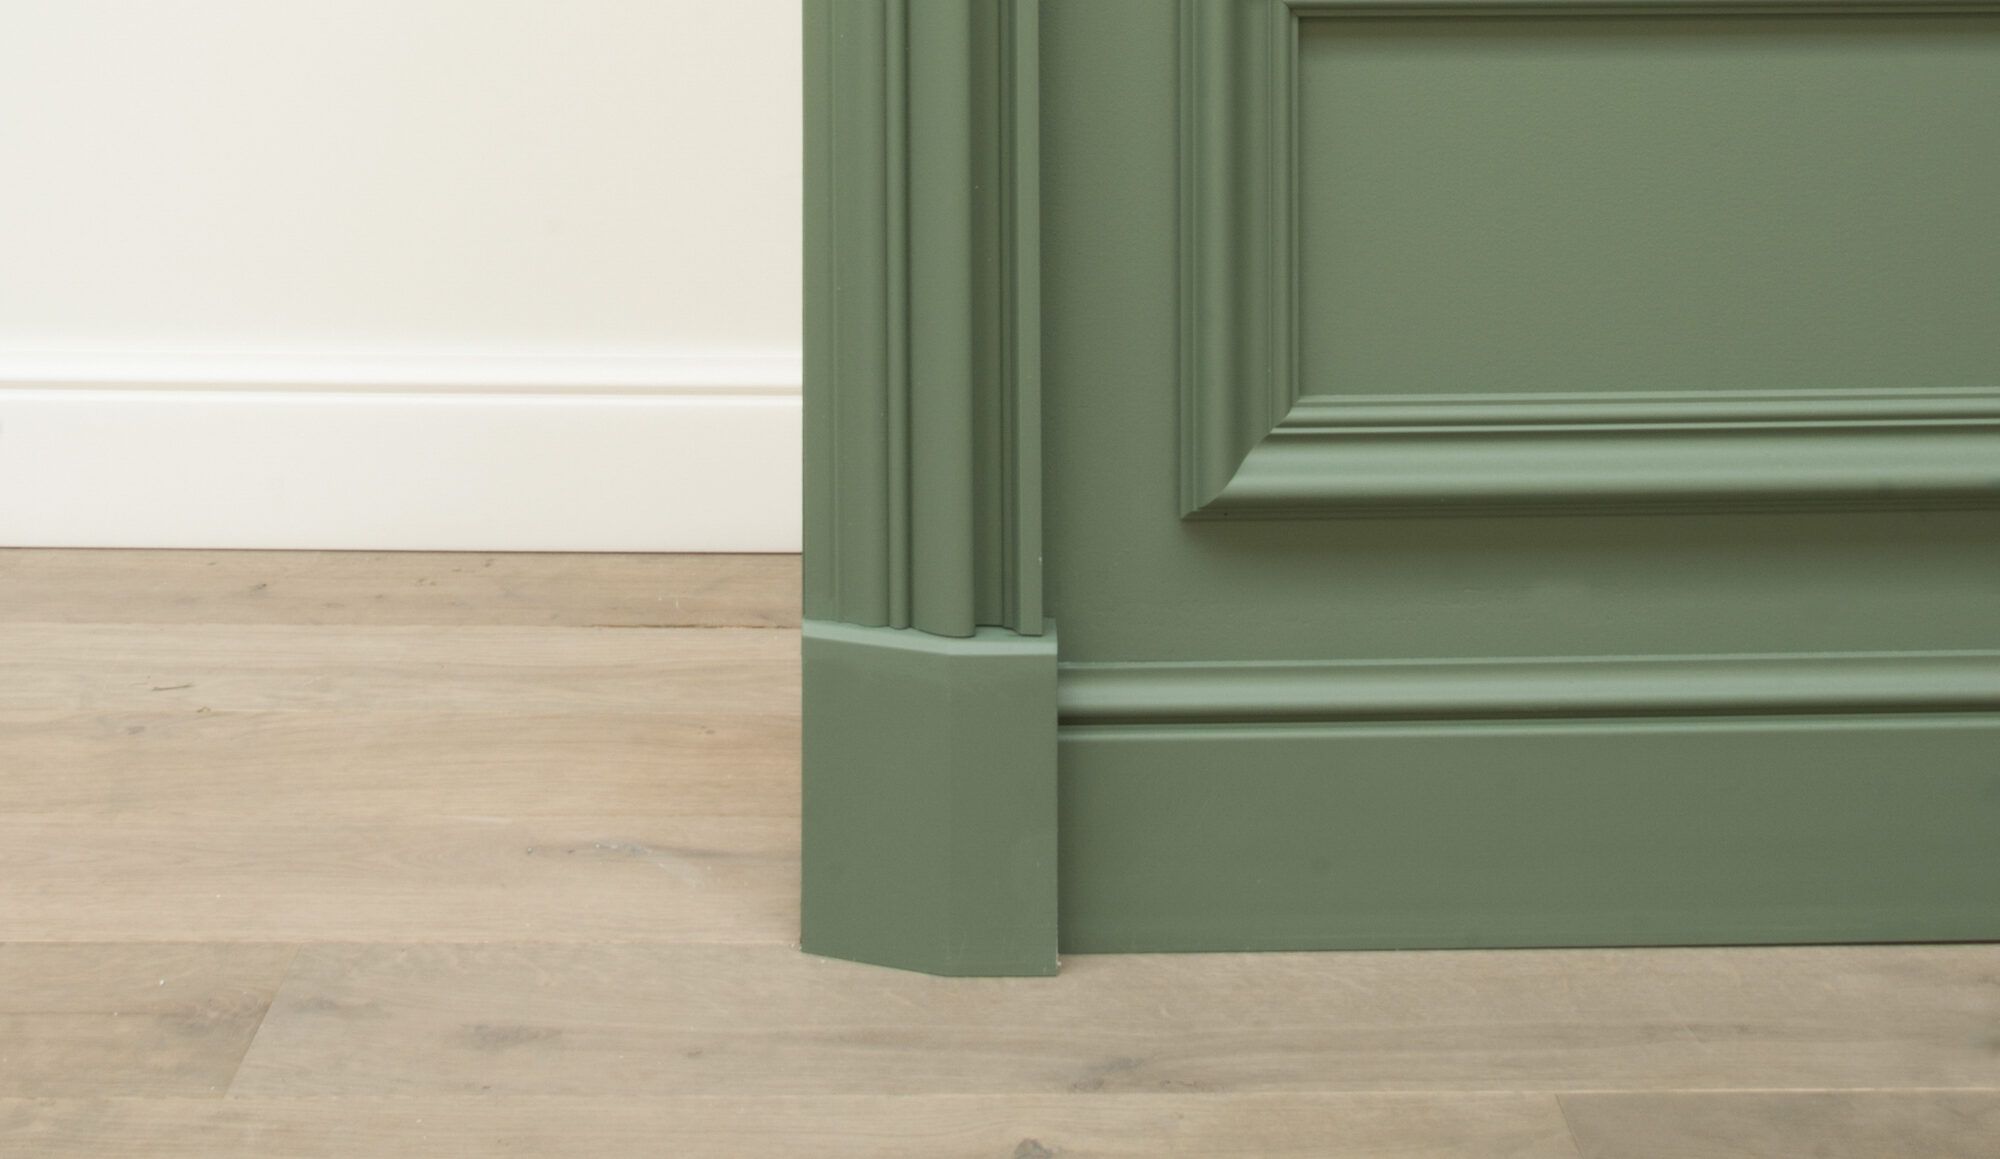
Last year the SX171 cover skirting was fantastic seller so Orac have introduced two new profiles that can be used to cover old unsightly skirting or cables and wires. The SX185 is a modern skirting and features a soft rounded top. The SX186 is a classic ogee style skirting and with a height of 13.8cm is perfect for both new build and traditional properties.
Our ever popular CX106 and CX123 coving profiles are now available in a flexible form. Our flexible covings are the ideal choice for finishing around curved walls or bay windows. Simply order the amount of flexible coving you need for the curve and use the standard straight profile around the remainder of the room.
MULTI-FUNCTIONAL PROFILES
The multi-functional profiles have been growing in trend over the last year and now we have three new profiles added to the range. The Cascade range of profiles (DX182, DX183 and DX184) feature a flat face with a softly rounded edge. They can be used as a contemporary style coving, wall moulding, skirting board and door architrave. Using as both a skirting and door architrave creates a truly modern look and you can integrate the moulding seamlessly from floor to around the door. All three are listed under contemporary coving, skirting and architrave sections.

DX182 Multi-Functional Profile
Dx183 Multi-Functional Profile
DX184 Multi-Functional Profile
DADO RAIL / PANEL MOULDINGS / DOOR ARCHITRAVES
There are two new additions to this range. PX175 is a plain moulding which can be used as small dado rail or use to create panelling on walls or ceilings. This is made in Duropolymer so gives a cost effective option for creating your design. The DX174 is a smaller version of the popular DX170 and can be used as a dado rail, picture rail or door architrave. It is supplied in longer 2.3 metre lengths
Spring Stove Offer
Spring is finally here and now is a great time to start looking to update your home with a new fireplace or stove.
Our spring stove offer is now on with a FREE register plate plus 1 metre black flue pipe with every stove order over £800. This gives you a fantastic saving of £145. Offer applies to woodburning, multi-fuel and gas stoves and the value of £800 applies to complete fireplace order and not just the cost of stove.
Visit our showroom soon to see our fantastic choice of stoves, beams and fireplaces and discuss your requirements. We are sure we can help find your perfect stove or fireplace.
Terms & conditions apply. Offer excludes enameled flue pipe.
Clock Wood Burning Stoves
We are delighted to be the new Glasgow dealer for Clock wood burning stoves. We now have the Blifthfield 5kw stove on display in our showroom and customers are loving the classic and simple design with large viewing glass. It was finalist at this years Hearth & Home exhibition and we think it is going to become one of our bestselling stoves. Why not pop into the showroom to see it for yourself.
Clock stoves are 100% manufactured in the UK, are Defra approved, multi-fuel and fully compliant with the Ecodesign 2022 legislation. Available in a choice of colours and also available as log store version.
View our wood burning stove product range here.
Fireplaces & Stoves Glasgow
Well it is starting to feel a lot like Autumn and now is the time to think about a new stove or fireplace to warm your home. We have some lovely new fireplaces and stoves in the showroom and there is still plenty of time to have installed before Christmas. Visit our showroom to see our new updated displays and discuss your requirements.
New fireplace displays include the Jade limestone fireplace, the Provence fireplace from FDP, Paris white painted surround, Harton cast iron mantel, Hamish solid oak. Avellino in agean limestone and the Gainsborough in brushed oak.
New fires include Evonic electric fires and the high efficiency Energis gas fire from Nu-Flame.
New stove models include the stunning new Clock stove, Burley Holywell wood burner, Evolution 5 stove and the Nordpeis Bergen stove.