How To Transform Your Ceilings Within a Budget
Ceiling designs have seen some interesting trends over the years, from popcorn ceilings to skip trowels, these trends were mostly born from laziness when building homes from 1945 to 1990. As a result, these designs still exist in many homes today and are usually the first thing that new home-owners will renovate as it can be considered outdated. As trends come and go, our ceilings can become forgotten about, effectively creating a time-capsule in your home.
To help you stay on trend, we’ve outlined some ways below in which you can spruce up your space and create unique and interesting focal points in your home to ensure your ceilings do not get forgotten in the design process.
Customise Your Ceiling Roses
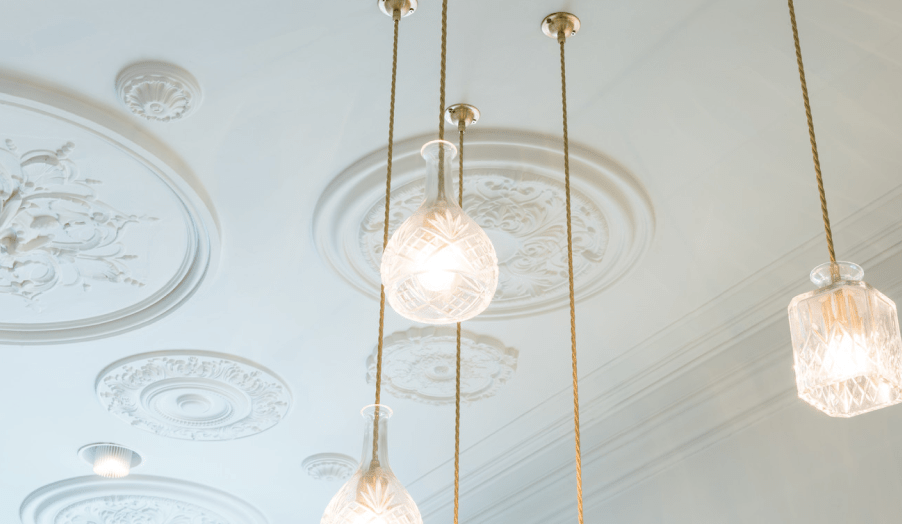
Ceiling roses are an elegant way to add a touch of decorative detailing to your ceiling and make for an interesting feature. In the past, we’ve seen these ceiling roses being kept plain white or painted in neutral colours but, as of this year, people are starting to paint their ceiling roses some bold colours in a streak of genius. From deep blues to vibrant yellows, we can’t deny the eye-catching focal point of the bold ceiling roses and the way it can really tie a look together to create a stunning living space. Painting your ceiling roses a bold or pastel colour is a fantastic way to blend the old and the new with a fun twist.
Our collection of ceiling roses are super easy to install using specialist Orac adhesives and are all finished with a white primer ready for the finishing touch of paint.
If you require any guidance on what type of ceiling rose would suit your property, please contact us and we will be happy to help. We have a style to suit all property types.
View our full range of ceiling roses here.
Go Bold With Colour
Don’t be afraid of painting your ceiling a fabulous colour. Alongside the painting of ceiling roses, 2022 has also seen an uprise in the painting of ceilings themselves. Whether it’s to match soft furnishing, skirtings or doors, painting your ceiling a bold, fun colour can create a wonderful contrast and make the room feel vibrant yet cosy. In the past, there was fear of painting ceilings as it could make the room appear smaller but with current trends, this fear has ebbed away and we’re seeing more bright ceilings than ever before. If you’re lucky enough to have tall ceilings, you should definitely try this out to see how it can completely transform a space and further enhance your space to your tastes.
Go Wild With Wallpaper
Wallpaper has long since been a popular choice when it comes to decorating your space due to a range of patterns – from faux brick or wood, understated and traditional patterns, or bold and vibrant colours, wallpaper can be a great choice for your living space. So it comes at no surprise that wallpaper ceilings have become a trend for this year. After all, who says you have to be limited to just four walls? Have fun with your fifth – and often forgotten – wall and utilise every inch of your room to reflect your design goals.
Stripes For Whimsy
A relatively cost-effective and less time-consuming way to liven up your ceilings is to paint stripes using a paint of your choice – we think the bolder the better. For smaller rooms, it may be best to run the stripes parallel to the flooring to ensure you do not make the space seem smaller but, for larger rooms, go wild with stripes in any direction you desire. This will force the eye up and ensure that your space is interesting, unique and put together. Experiment with line thickness and different colours to achieve your dream design goals.
Coving and Cornice For a Chic Look
A more traditional way to highlight your ceiling, coving is a time-tested way to draw the eye up and make your living space really pop. From traditional Victorian designs to modern, sleek designs, coving and cornices can really help bring out the character of your home. Whether you keep them a neutral colour or think outside the box with a bold colour, coving can really boost a room. For an even more bold statement, tailor your lighting with LED coverings, ensuring you have interesting lighting in any room.
You can view our selection of LED coving here.
Stay Relevant With Natural Elements
Wood and brick have seen a comeback in the world of interior design this year, so make a statement with a wood or brick ceiling. This doesn’t have to be an expensive job – there are a few ways to achieve this look while looking after your purse strings. The first way is to get your hands on a faux-wood or brick wallpaper and go for it. Faux brick can look particularly stunning in rooms with arched ceilings or in rustic kitchens or dining rooms. The possibilities are endless with an abundance of wallpaper choices at your disposal.
Time To Experiment
Take the dive and jazz up your living space with some interesting ceilings this year, whether that be a zingy orange feature or some fantastic coving lighting. Remember, nothing is permanent so take the time to experiment with your tastes and what works well for your home. There are no wrong answers in interior design, so run with that freedom and achieve the home of your dreams.
Coving Designs & Modern Cornice Styles
Coving is perfect for creating sleek and beautiful transitions between the wall and ceiling, covering imperfections whilst adding detail and an elegant finish. Our coving collection comes in a multitude of designs, offering options for both traditional period properties and modern new builds. We have plenty of coving inspiration to help you decide which style of coving is best suited to the architecture of your home and your existing interior design.
Our lightweight coving comes in a variety of designs. From simplistic designs to intricate and decorative period mouldings, to flexible options for curved walls or bay window areas, we have a coving style to suit your home’s interior.
Whether it’s for a grand Victorian property or modern loft apartment, coving is an effective way to enhance your design and add character to your rooms.
Styles of Coving
The style of coving you choose should mirror and enrich your existing decor. For example, if you live in a period property with intricate detailing, high ceilings and large rooms then a traditional coving style would be the perfect finishing interior touch. Whereas if you live in a new build home, use this blank canvas to your advantage and choose a style that suits your design aspirations. We have styles that will give your interior a sleek design finish or styles with an edgy finish that will draw attention. The architectural design of your home should be a focal consideration to the style of coving that you choose.
For traditional period properties with high ceilings we would suggest one of our best-selling Luxxus coving designs, the C217 London cornice. This coving is perfect for all rooms. Its elegant, swan neck shape with ovolo moulding at the top and bottom will complement any decor. This profile is also multi-functional. It can be turned either way, giving you the power to transform your interior to suit your design style.
Alternatively, for grand Victorian properties we would suggest our C219 Newcastle Victorian cornice as this stunning design complements the original features found in Victorian properties. This style is popular within our Glasgow showroom due to its decorative profile featuring an ornate leaf and beaded detail running along the bottom edge. This large coving design is perfect for a lounge or dining room with ceiling heights above 3 metres.
If you live in an Edwardian or Georgian home, we would recommend the installation of our classic C339 Cotswold Cornice. This elegant design suits properties which boast simple yet traditional styles. With beautiful deep bay windows, and larger living rooms, the Cotswold cornice will further enhance the architecture of your property, helping to restore some authenticity to its design.
For traditional properties with bay windows or curved windows, or those who simply want to jazz up their existing interior, we’d suggest our C373 Flexible Uplighting Coving. This unique design will add an ultra modern touch to your interior through a beautiful lighting concept designed by Ulf Moritz. It’s the perfect moulding to make your interior stand out!
On the other hand, for modern new build properties, we have a selection of beautiful designs that will complement smaller ceiling heights. A touch of luxury and decoration can really make your interior come to life, and we’ve got some ideas to help you turn your house into a home.
Orac’s Kent C353 Coving design boasts a plain and flat profile featuring linear lines and a recessed shadow line at the back. This style of contemporary coving is popular across the UK as it gives your property additional edge and design style. For those who really want to make a statement, we’d suggest running a LED light strip at the back of the coving to create a downwards lighting effect. This will give you a soft and effective interior finish.
Another style we would recommend is our C360 Bristol Modern Coving design. The Bristol is the smallest within our linear contemporary coving collection and is perfect for modern properties with lower ceiling heights. This flat coving will give you a simple and sleek wall to ceiling finish.
Lastly, our C391 Stepped Downlighting Coving design would look beautiful in modern properties. This design is also multi-functional, it can be used as a LED downlighting coving, normal ceiling coving or used as curtain coving to hide the curtain track. The use of LED lighting within this coving will add ambience to any room, particularly living rooms.
All of our coving designs are lightweight, super easy to install using speciality Orac adhesives and finished with a white primer, ready for that final touch of paint to match your existing colour palette. We hope our coving inspiration will help you decide on the best style suited to your requirements and design aspirations. However, if you require any further guidance, please contact us, we’d be happy to help.
We’ve only covered a small snippet of our designs, for more design inspiration, view all of our lightweight coving designs.
How to Fit a Ceiling Rose
A ceiling rose is a popular architectural piece that can frame and highlight a light fixture, creating a focal point within your room. As well as being easy to install, the ceiling rose is just as easy to remove or replace, making it an extremely diverse and interchangeable addition to your home.
Below we have detailed what you’ll need, and step-by-step instructions on how to install one of our lightweight ceiling roses by yourself.
Top tip: Your lightweight ceiling rose can be painted before or after installation to match your decor.
What You’ll Need
- Ceiling rose
- Cornice adhesive
- Electric drill
- Plasterboard screws
- 120-grit sandpaper pad
- Hand sander
- Ventilation mask
- Tack cloth
- Ladder
- Pencil
- Stud finder (optional)
- Caulk (optional)
- Paint (optional)
For changing a ceiling rose.
- Utility knife
- Putty knife
Step-By-Step: How to install a ceiling rose
Surface Preparation
The first and most important step is to make sure that the electricity is switched off at the mains before you begin removing your light fixture.
Then you must prepare the ceiling for installation. Take down any existing light fixture, and remove any old wallpaper, paint, grease or dirt from your surface. For best results, sand the surface where your rose will be, with a 120-grit sandpaper pad and hand sander, (please handle with caution, and wear a ventilation mask when sanding!), then wipe down with a tack cloth.
Changing a Ceiling Rose
If you’re replacing a ceiling rose, you’ll need to first remove the existing one from your ceiling. Again, please switch off the electricity and the mains beforehand, and remove the light fixture.
Take a utility knife and cut a shallow score all the way around the decorative piece, then direct the leading end of a putty knife blade to the edge of the ceiling rosette, and slot in the gap between the ceiling and rosette. Tap the putty knife with a hammer to push the blade under the rosette, and repeat all around the circumference. Repeat to the centre of the rosette, until it is loose enough to pull off.
Ceiling Rose Preparation
With your newly purchased ceiling rose, drill a hole in the centre of the rose with an electric drill, big enough so the electric cord can fit through. Then, with the help of a ladder, hold your ceiling rose into place and draw round the outline with a pencil (this will be much easier if you have an additional person to hold the ceiling rose in place). Finally, if possible, find where the ceiling joists are with either a stud finder, or professional electrician.
Lightweight Ceiling Rose Installation
Set the ceiling rose, face down on a large table and apply one of our easy-to-use adhesive glues to the centre of the rose, and spread evenly with a notched spreader, whilst leaving a 5cm gap around the edges.
Take the rose to the ceiling, place it within your pencil marking, thread the electrical cord through, then push and hold with force for around three minutes. For extra security, with your electric drill, screw plaster screws through your ceiling rose to your ceiling joists, then wipe down any excess adhesive before leaving to dry.
Top tip: Take a caulking gun and spread around the edges in a colour that matches your rose, to make the rosette more coherent and seamless with the ceiling.
Lastly, we would recommend waiting around 24 hours before reattaching your light fixture.
Our Ceiling Roses
At WM Boyle we have a range of Plaster and Lightweight ceiling roses that come in a variety of aesthetic styles, and are super easy to install. Our traditional plaster ceiling roses have an authentic period-style finish, but are heavier so will need slightly more pressure and secure fixing when installing, whilst our lightweight ceiling roses, with intricate details, are made of high-quality, lightweight, polyethylene materials so exceptionally easy to install.
If you require any guidance to decide what type of ceiling rose would suit your property and style, we will be more than happy to offer our advice. Contact us and we will find the perfect ceiling rose for you and your home.
View our full lightweight ceiling rose range here.
How to Paint Coving
Ask yourself one simple question, would you like your coving to stay white and modern or would you like to give your interior a pop of colour? If your answer is the latter, we’ve created a step-by-step home guide to help you paint your coving and give your interior that finishing touch. Please remember that all our Orac coving and cornices come primed so all you need to do is install and paint.
Paint Ideas For Coving
Whether you like to stick to tradition or like a little flamboyance, there are endless design opportunities when it comes to painting.
Traditional
The traditional coving look is simply timeless and stunning. We love it when coving contrasts with a strong interior wall colour, for example, white coving alongside rich greens and blues.
Tall Walls
If you’d like to elongate your walls, then painting your coving the same colour as your wall is the perfect idea.
Colourful Ceilings
Take advantage of your coving and add a splash of colour to your interior by painting your coving and ceiling a different colour to your walls. This looks beautiful in traditional Victorian homes with high ceilings.
Accent Colour Covings
Lastly, adding accent colour to your coving will create a strong, authentic border between the wall and ceiling. If you have a minimalist ambience throughout your room, a touch of colour will add dimension and can really bring your interior to life.
Discover our modern stepped coving.
What’s the best paint to use for coving?
When it comes to painting cornices and coving, the choice is yours. We’d recommend that you use a water-based paint that can be applied to interior walls. Whichever paint you choose to use, always think about the amount of sheen you would like to achieve. Sheen means the amount of light that you wish your paint to reflect, so matte paints will have the least sheen and silk will have the highest.
- Matte – very popular and in trend for interiors as it offers a smooth, flat finish that doesn’t offer much light reflection.
- Eggshell – gives you more light reflection than matte, offering a luster finish compared to a flat finish. Eggshell also withstands staining better than matte.
- Soft sheen & silky – offers a silk finish with mid-sheen finishes. Soft and silky is much easier to clean and highly durable.
Discover our Orac C395 uplit coving.
How To Paint Coving: Step-by-Step Guide
For the best finish and minimal mess, we’ve created a step-by-step guide that will help you achieve the look you’re looking for – without the stress. We can’t emphasise this enough, always prepare your room before painting, you’re painting at a height so it’s important your paint is accessible to you and everything valuable is covered to avoid splashing!
- Cover your floor with a dust sheet, move your furniture and cover everything you don’t want painted.
- Apply masking tape or masking film around the coving and on the ceiling just above the length of the coving to avoid paint mismatches. Run your thumb along the tape to make sure it’s stuck properly. If you’re going free hand then this step doesn’t apply to you, but if you’re new to interior painting, then masking tape will give you the best possible finish.
- Use a medium sized nylon or synthetic paint brush, dip your brush into your paint, not too much – avoiding spillage and splashes. Apply the paint gradually, starting with small sections. If you’ve got masking tape, you can start at the edges and work inwards, but if you’re going free hand, we’d recommend starting an inch away from the corners and slowly working your way towards the edges to avoid excess paint on the ceiling.
- For traditional detailed cornices with patterns, perhaps a smaller brush would be useful as you want to dab the brush into any crevices.
- Once you’ve applied one layer of paint, leave it to completely dry before applying your second coat. Perhaps two hours.
- After your paint has dried, inspect your work, then apply the second coat which tends to be slightly thicker than the first but make sure you apply this coat evenly for a smooth finish.
- Again, leave this coat to dry completely.
- Coving tends to need between 1 – 3 coats of paint for that beautiful smooth finish. However, if you are happy with the results after 2 coats, that’s perfect.
With our step-by-step painting guide, DIY just got that much easier at an affordable price. Whether it’s a traditional intricate cornice for your living room, sleek and smooth modern coving for your master bedroom, our range of Orac covings and cornices look spectacular with a splash of paint.
How To Measure Coving Sizes & Width
When measuring coving sizes, customers often ask us what size they should go for. Although it is mainly down to individual preference. We’ve come up with a few tips on how to measure plaster coving. From coving sizes, to coving dimensions, read on to find out more and narrow down your choices.
A lot of the time people can misunderstand the measurements when measuring the actual size of the coving. The majority of the time, measuring coving size is always given in terms of the height of how far the coving extends down the wall from the ceiling, along with the projection of how far the coving extends across the ceiling from the wall. This is often confused with measuring the diagonal face across the front of a piece of coving. For example, we sell coving that is 15cm high and 12cm projection, this means the diagonal face will be around 19cm long, however this is not stated in many coving descriptions.
Find the Right Coving Size For You
When choosing the perfect cornice for your home or commercial space, the determining factor will depend on how much prominence you wish the coving to have within your interior design.
We would recommend going for a size that is in proportion with the height and size of the room. We understand that it can be difficult to imagine how different coving sizes will look in a room, therefore we would always recommend buying and testing a sample of the cornice to be sure. Contact us and we will be happy to supply some samples of your choice.
Small Coving & Cornices
If your ceiling height is below 2.75 metres (9 foot), our small coving and cornice styles are the ideal size as they can offer the perfect sleek finish between any wall and ceiling joint. As well as finishing off a space such as a living room, our smaller coving looks great in spaces with tall units and cabinets, like kitchens and bathrooms.
Medium Coving & Cornices
For the majority of spaces and homes, our medium sized coving will be suitable. For example, our C353 ‘Kent’ coving or our C355 ‘Manchester’ coving are a good choice for contemporary spaces and homes.
Large Coving & Cornices
Our larger coving and cornices are often used for hiding wires and pipework, and can usually be found in larger rooms with high ceilings which are common in older Victorian properties. It’s important that you only choose this size if you are sure the coving will be in proportion with the room. For example, our C307 ‘Kensington’ lightweight cornice is 19.5cm high by 19.5cm projection, therefore we recommend using this in rooms with ceilings at least 4.3 metres high (14 foot). This type of coving looks beautiful in traditional Victorian homes.
Discover Our Full Collection
Once you have followed our tips and tricks on how to measure and find the right coving size for your home or space, have a browse through our full collection of coving. Whether you want to keep it plain and simple, or add some subtle details with a hint of pattern, we guarantee you’ll find the perfect lightweight coving here at Wm. Boyle & Co.
How to Fit a Picture & Dado Rail
Fitting a dado rail, also known as a picture rail is a fairly straightforward DIY project which you can undertake yourself in your home. We’ve put together some tips on how to fit a picture rail, with all the right tools and materials to do so.
What You’ll Need
- Dado & Picture Rail
- Orac Adhesive
- Caulk Gun
- Spirit Level
- Chalk Line
- Nail Gun
- Nails
- Mitre box
- Hand Saw
- Pencil
- Tape Measure
Please note, you can use your own alternative tools if you are unable to use any of the items listed above.
Step-By-Step: How to Fit Dado Rail
Measure & Cut to Size
With any DIY project, preparation is key to achieving your desired finish, so make sure that your walls are clean, ensuring any necessary repairs or plastering is complete before you add your picture rail. Top tip: paint your dado rail before you hang it; this will ensure you have a flawless finish, with tidy edges.
The first step is to measure the wall length and match that up to the first piece of rail and cut to size if necessary. Top tip: always remember to double-check your measurements before you cut anything. To cut the perfect angle for the wall, use a hand saw and mitre box, which makes it a lot easier to cut at an angle, if needed.
Mark the Wall & Fit Your First Piece
Top tip: Before fitting your first piece, it can help to measure and mark the wall with chalk to give you a clear guideline of where to fit your dado rail.
First use the tape measure and pencil to mark where you want to position the rail, then use the spirit level and chalk to create a perfectly horizontal guideline along the wall. Keep moving the spirit level around the room until there is a guideline across the entire wall. This will make fitting the rail a lot easier.
Now take the first piece of rail, hold it in position and use the spirit level to make sure it’s perfectly level. When it is level you can either nail it to the wall or glue it into position. If using nails, be sure to add a nail every 50cm or so, and if using adhesive, create an even zig-zag across the back of the picture rail and press firmly into place. The adhesive creates a flawless finish, whereas you must caulk the nails to fill in the imperfections.
Best Adhesive For Dado Rail
At WM Boyle we have a range of great Decofix glues and adhesives to ensure your dado rail remains secure. They give additional strength and durability to the joints of Orac products. Our Decofix Pro is our extra strong installation adhesive, which ensures a long-lasting seal between the mouldings of your dado rail.
Most of our adhesives are available from stock and are normally delivered straight to you within 2-3 working days.
Top tip: if using nails, make sure there are no cables, wires or pipes behind the picture rail.
How To Cut Dado Rail Corners
Take the next piece and hold it to the wall so that end touches the already fitted piece. Mark the end touching your fitted piece with a pencil as you will need to cut this before fixing it in place.
Use one of our Mitre box products and a hand saw to cut a precise straight, 45-degree cut in the same direction as your marking. Then, to ensure your dado rails are as seamless as possible, use sandpaper to smooth the profile, so it perfectly fits over the installed piece.
Finish the Job
Now that your first piece has been fitted, you can line up the rest and fit them as you go. Simply repeat the above process until you have fixed the remaining picture rails to the wall.
To create a flawless and professional finish, use the caulk gun to fill in any gaps in the joins and create a seal with the caulk where the rail meets the wall.
The following video has more information on fitting panel mouldings such as pictures and dado rails.
Our Picture & Dado Rails
Picture and dado rails are simple additions to your home but create a dramatic effect on the aesthetic of your room. With a range of styles to suit all homes, the design possibilities of dado and picture rails are endless. With a large range of sizes and styles, our rails are extremely durable and suit all homes, from traditional high-ceiling spaces to new, contemporary properties. Discover our dado and picture rails.
How To Decorate a Victorian Home
Victorian properties are beautifully unique, full of character and open to a world of design possibilities. Sturdy, well-built and full of lofty ceilings and large windows, they make the dream home for anyone, especially when it’s a renovation project and you can see your transformations and visions come to life! Within the interior design world, there is always modernisation, new trends, new interior mouldings, styles and design details, and often owners of Victorian homes are continuously on the lookout for how to bring their home into the 21st century whilst maintaining an element of their home’s original grandeur. We’ve got some top tips on how to freshen up the style of your interior whilst emulating its original, most enviable features.
Top Design Tips
There are plenty of ways to recreate, redesign and change up your interior. We’ve listed some simple yet effective tips that will give your interior that long lasting design look and finish.
1. Victorian Cornicing
Ornate cornicing is a principal feature of Victorian house decor. These decorative touches around the ceiling edge are one of the most iconic design elements within Victorian homes. If your interior boasts original cornicing, we’d recommend restoring these, or if you’d prefer a design change, add something new. We’ve got some beautiful ornate cornicing available to complement your Victorian architecture.
As Victorian properties tend to have bay windows, we’d recommend the addition of standard cornicing in order to bend round your curved windows, covering imperfections whilst creating seamless transitions between the walls and ceilings. Our first recommendation would be our C219 Newcastle Victorian cornice with a delicate acanthus leaf design. Acanthus leaf designs are commonly found in Victorian properties; therefore this design allows you to emulate the era and history of your property through your interior design detail.

C219 Newcastle leaf decorative cornice
On the other hand, if you’d prefer to change up your interior with more simplistic, yet elegant detailing, we’d suggest our C217 Flexible Cornice. With a swan’s neck and plain ovolo shaped moulding at the top and bottom, this design will complement any decor and curve beautifully around bay windows. This is one of our best sellers due to its traditional class and style.

C217 flexible coving for curved walls
2. Dado Rails
Once your elegant cornicing is in place, you’ll need to make sure it gets the attention it deserves. And we’ve got some tricks that will draw your guests’ eyes up those never-ending Victorian walls. Dado rails will help break up the blank spaces, complement the architecture and high ceilings, whilst providing your room’s interior with an elegant and decorative finish.
We’d recommend breaking up the wall colours by adding a new colour above the dado rail, an accent colour or dark shade which would instantly give your walls character. Plus, they immediately take your eyes skyward as you’re drawn to the design and colour. Or you could simply keep the colour scheme the same, paint over the dado rail and create a continuous and consistent look. With that in mind, we’ve got some fantastic dado rail mouldings to give your Victorian interior that WOW factor!
Our P4025 Autorie dado rail is a chunky design that features a sculptured profile making it perfect for traditional styled homes. It is multi-functional, it can be used as a simple dado rail, a ceiling astragal or used to create a simple yet effective wall panel design. Additionally, it’s a flexible moulding therefore it can bend round curved walls and bay windows.
Alternatively, we’d recommend our timeless DX119 large dado rail which is perfect for traditional properties with high ceilings. Again, this design is multifunctional, as its chunky profile can be used to create a picture rail, door architrave or skirting board. If used as a skirting profile, it would create a unique and classic high skirting design.
3. High Ceiling Features
With high ceilings being a staple feature of Victorian homes, we’d recommend dressing your ceilings with a touch of vintage glamour and authenticity with an ornate ceiling rose. The majority of properties built in the Victorian era all spotlighted a decorative ceiling rose in order to mirror the overall style and tradition of their homes. Here at Wm Boyle, we offer a range of beautiful lightweight ceiling roses that would perfectly complement your interior through their intricacy and aesthetic.
For example, our R23 decorative ceiling rose boasts an acanthus leaf, egg and dart design pattern, making it perfect for all traditional Victorian homes. This particular design is also available in a smaller size, affording you the option of design consistency throughout your interior.
Another option could be our large R64 decorative ceiling rose which features floral swings, bows and leaves. Perfect for all Victorian properties, especially when featured in formal rooms.
4. Make Fireplaces A Feature
Victorian fireplaces are the ultimate home feature for all period properties. A distinguishing feature, fireplaces can create a striking focal point amidst your interior, radiating both warmth and elegance. Especially in the chill of the winter months and the dark nights, the warmth of red, orange and yellow flames provides both comfort and a great design aesthetic.
Our Glasgow Fireplace Showroom offers a wide selection of beautiful designs and styles, perfect for all properties. The Asquith Limestone Fireplace is a timeless design, perfect for Victorian homes through its elegance, soft curves and tall mantelpiece. A cast iron insert or stove would blend perfectly within this limestone fire surround.
Stoves are a beautiful addition to any interior. From our collection, we’d suggest an Esse Stove to further complement your home. Esse have manufactured both multi-fuel and gas stoves in various styles to ensure they have a design that will blend into your interior. The choice of design and style is yours, whether you stick to a traditional looking stove or take the plunge, give your interior a new look with a modern stove. We’d be happy to help you decide which style of stove would best suit your home and your design aspirations!
5. Statement Wall Panelling Features
Walls themselves can also be the main feature of Victorian homes and not just because of their never ending height. Decorative wall finishes, wainscoting panels, and tongue and groove designs are a great way to add dimension and drama to your home’s interior.
Our W120 Autorie wall panel is the perfect addition to any Victorian home. This panel creates instant depth. Whether it’s installed in the hallway, living room, dining room or formal bedroom, this design complements the Victorian character and ambience.

Orac W120 and W121 wall panel
Victorian Home Features
As well as some top tips we’d also like to give you some background on the main features which can be found in Victorian homes.
The most recognisable and defining external features of Victorian properties include beautiful porchways, stained glass doorways, sash windows and multicoloured brickwork. On the inside, it’s often the high ceilings that grab people’s attention first. But you should also pay special attention to the other interior mouldings including cornicing, panelling and ceiling roses as these designs make a Victorian home elegant. Orac have various lightweight interior mouldings that would perfectly match your existing interior or give your interior a new look!
The Victorian era in Britain seen the industrial revolution and introduced many changes to society, including the spread of wealth, which impacted the way homes were constructed. The wake of the industrial revolution meant that houses became more accessible and affordable to the rising middle class, which created a growing demand for new housing. The Victorian era is also characterised by rows of terraced housing within narrow streets. The Victorian property style was influenced by the renaissance and Gothic revival movement, with properties featuring unique characteristics including bay windows, stained glass doorways, high ceilings, sash windows, ornamental stonework and multicoloured brickwork. Victorian homes are visually and beautifully unique, full of character and open to a world of interior design opportunities. We have some top tips on how to style and emulate the architecture of your Victorian property through the installation of various lightweight products.
Boasting high ceilings, the addition of a ceiling rose is the perfect way to add a touch of vintage glamour or authenticity to a Victorian property. From modest terraces to the grandest villas, the Victorian era seen the majority of properties spotlighting ornate or decorative ceiling roses to emulate the overall style of their home. Wm Boyle offers a range of lightweight ceiling roses that will complement your home’s interior through their aesthetic and intricate designs.
Our R23 Lightweight Decorative Ceiling Rose affords an acanthus leaf and egg and dart design pattern, making it ideal for Victorian properties with ceilings of at least 2.7m high. This ceiling rose is also available in a smaller version affording you design consistency throughout the entirety of your property, even in smaller rooms.

R23 Lightweight ceiling rose
On the other hand, we would also recommend our R64 Large Decorative Ceiling Rose which features floral swings, bows and leaves. This is our largest rose design which complements Victorian styled properties with formal rooms and high ceilings. Once installed you cannot distinguish between this lightweight design and a plaster ceiling design, the authenticity and intricacy are beautiful.

R64 ceiling rose
Victorian bay windows are recognised for their ability to create aesthetic accents and allow ample light to enter the room space thus illuminating the room’s interior during daylight. To complement the existing architecture, we would recommend the addition of flexible coving or cornices to bend round your curved bay window, covering cracks or creating seamless transitions between the walls and ceilings. From ornate to simplistic designs, we offer a range of styles to suit your interior aspirations. For Victorian properties, we would recommend a more simplistic yet elegant design- C217 Flexible Cornice. Its swans’ neck, plain shape with ovolo moulding at the top and bottom will complement any décor, and curve seamlessly across bay windows. This is a bestseller within our flexible and bendy collection as it works perfectly within grand Victorian properties as well as modern new builds.

C217 flexible coving for curved walls
Another way to emulate the tradition, the era and design of your Victorian property is through the addition of an ornate fireplace or fire surround to create warmth and aesthetic to your living room. Our Glasgow Fireplace Showroom offers a wide selection of designs and styles to suit all property styles including Victorian homes. The addition of our Asquith Limestone Fireplace would perfectly suit the interior and architecture of your Victorian home through its elegance, soft curves and tall mantelpiece. This is a classic fireplace design and a cast iron insert or stove blends effortlessly within its surround.
Stoves are becoming really populating, allowing you a taste of both modern and period. We would recommend purchasing an Esse Stove to complement your Victorian property. Esse manufacture a beautiful selection of multi-fuel and gas stoves in all styles to ensure the perfect stove to blend into your existing interior. The choice of style and design is yours whether you adhere to your existing Victorian architecture or venture towards a new modern look and feel. We are happy to help you decide on the perfect stove at our Glasgow Showroom.
The style of a Victorian property can also be enhanced through the addition of wall panels to re-capture its era and architecture. Our sculpted W120 Autoire Wall Panel will help you create instant wall depth. Whether used in hallways, living rooms or dining areas, this design resonates the Victorian character and ambience.

Orac W120 wall panel
On the other hand, we would also recommend the installation of our sculpted D504 Rectangular Raised Wall Panel. This panelling can be positioned between a dado rail and skirting board in order to create a classic Wainscoting design. Wainscoting is perfect for Victorian homes and for decorating long and narrow hallways, offering a touch of detail and elegance.

D504 raised door panel
Victorian properties would also benefit from the addition of skirting boards to create flawless ceiling to floor transitions. Wm Boyle’s collection of Victorian styled skirting boards will emulate the style and elegance of your existing interior. Our SX118 Skirting Board is the perfect design with a plain ogee profile that will add charm and sophistication to your Victorian home. A dado rail would also be the ideal addition to your Victorian period property by adding a touch of elegant decor to your interior. Our P4025 Autorie Dado Rail is a chunky design that boasts a sculpted profile making it perfect for a Victorian build.

SX118 Orac lightweight skirting

P4025 panel moulding and dado rail
As you can see, there are plenty of ways to enhance your interior no matter whether it’s emulating the Victorian era or freshening up your interior with a modern twist. We hope that by following our top design tips for Victorian properties this will give your home charm, character and consistent aesthetic.
The design and décor of your interior is personal to you, but we are happy to point you in the right direction to suit your existing décor. We offer a range of beautiful lightweight interior products which will give you the design finish you’ve always dreamed of.
HOW TO FIT & INSTALL SKIRTING BOARDS
Skirting boards are used to provide a neat finish to your walls and protect floor-level plaster. Our range of white Orac skirting boards is easy to install and finished with a white primer ready for a final coat of paint.
Made from lightweight duropolymer, these skirting boards come in a variety of sizes and styles, catering to all homes including traditional Victorian terrace homes as well as those slightly more modern houses and apartments.
Our Orac skirting boards are made from lightweight duropolymer materials, meaning that all you need to attach the skirting to the wall is adhesive. They are waterproof, shockproof and impact resistant, making them a great choice for modern-day homes.
For a long-lasting and high-quality result, we recommend following our step-by-step instructions below. Whether you’re replacing existing boards or giving your interior that final touch with the addition of skirting boards, we’ve created a step-by-step guide to help you fix your skirting boards to the wall.
As well as showing you how to fit and install skirting boards, in this article, we will also show you how to cut your skirting to size, measure and cut angles for skirting corners and how to apply skirting adhesive.
To fit your skirting boards, you will need the following tools:
- Tape measure
- Protractor
- Pencil
- Mitre box & saw
- There are various mitre saw options including using a mitre box and a panel saw, a precision mitre saw, or an electric compound mitre saw.
- Caulking gun
- Adhesive
- Protective equipment i.e. gloves, eye protection and a dust mask
Before Starting to Fit Skirting Boards
Before you get started, we recommend storing your skirting boards and adhesives at room temperature and waiting 24 hours before installing them.
We would also suggest making sure that your walls are ready by checking the following:
- Are your walls flat?
- Are they dust-free?
- Have they been sanded and washed down?
- Are they dry with no grease stains?
If the answer to all the questions above is yes, then your walls are ready and you can start.
HOW TO CUT YOUR SKIRTING BOARDS:
Before you start fixing your skirting to the walls, you need to measure and then cut your skirting to ensure it fits perfectly against your wall and interior space. Don’t forget to calculate the angle of your wall corners as you’ll need to create internal and external corner joints as well. Internal corners face inwards, and external corners outwards.
In order to create your corner joints, use your protractor, measure the angle and if, for example, the skirting corner angle is 90 degrees, cut 2 45-degree angles.
Trade Secret: To ensure your measurements are correct, use a protractor, ruler, and pencil to mark your angles and a mitre box to cut.
Most of our skirting boards come in 2m lengths. Therefore you’ll need to measure your walls to calculate the skirting lengths required and cut the skirting boards to the required lengths for shorter sections. You’ll also need to calculate the angle of any corners and cut the ends of your skirting boards to create the required internal and external corner joints. Internal corners face inwards, and external corners outwards, as shown in the images below.
Internal corner example
Product shown: SX125 Small Contemporary Skirting Board
External corner example
Product shown: SX118 Skirting Board
When installing the skirting boards we recommend starting at the lefthand side of the door and working your way around the room in an anti-clockwise direction.
Follow the steps below for each length of skirting required.
- To create a skirting board corner joint, using your protractor or angle measurer, measure the angle of the corner required. If the total corner angle is 90 degrees, then you will need to cut 2 45 degree angles.
Top Tip: Although we assume that all room corners are 90 degree angles, in reality this is not always the case and measuring corner angles is an important part of fitting skirting so don’t skip this step!
- Using your tape measure, measure the required length of skirting. Mark on the back of the skirting board with a pencil the required length.
- Hold the skirting board up to the wall to gauge the direction of the cut that is required. On the top of the skirting board, using your pencil, lightly mark the direction in which the angle cut should be made.
Example: 90 degree corner (as shown below)
A 90-degree wall corner will require each board to be cut at an opposite 45-degree angle, as shown below:
Angle 1 (top of board view)
Angle 2 (top of board view)
- Set your mitre box to the required angle size and direction.
- Place the skirting board into the mitre box in an upright position with the front of the skirting board facing you. Make sure you secure the board tightly into the mitre box to avoid any movement during sawing, to ensure a clean finish.
Top Tip: When cutting a long length of skirting, support the board at the end you’re not cutting, to ensure it is level with the base of the mitre box as you cut.
- Using the saw, cut the board at the required angle.
- Repeat the steps above for the second skirting board length to complete the corner.
- Once you’ve cut both corners, hold the two boards together to ensure they fit together perfectly before fixing them permanently to the wall.
HOW TO FIT & ATTACH SKIRTING TO THE WALL
Unlike traditional wooden skirting boards, Orac skirting boards are made of a lightweight duropolymer meaning that you don’t need screws to fit and attach your skirting boards to the wall. The best application and finish will come from using adhesives.
There are various adhesives available to fit Orac skirting boards. You will need two adhesives to attach your skirting boards – one to fix the skirting boards to the walls, and one to join two skirting boards together e.g. for joints and corners.
Here are the types of Orac adhesives which we would recommend choosing from as the best way to attach your skirting boards. Each adhesive comes in various sizes to meet the needs of your project.
- Decofix® Pro adhesive – for use on interior walls and porous surfaces
- Decofix® Power – for use with heavy profiles or non-porous surfaces
- Decofix® Extra adhesive – for use on skirting joins and corners
HOW TO APPLY ADHESIVE TO SKIRTING BOARDS:
Using adhesive, and following the instructions shown, is what we see as the best way to attach skirting boards to the wall.
- Open your adhesive, attach the nozzle and snip the end off, as per product instructions, and insert the canister into the caulking gun.
- Take your length of cut skirting and apply adhesive to the back of the skirting board areas that will touch the wall (usually the top and bottom of the skirting boards). Please ensure you apply the adhesive evenly along the entire length of the skirting to ensure a long-lasting application (do not apply sporadically in blobs).
- Press and fix the skirting board against the wall, ensuring that you work your way along the entire length of the board to double-check that all necessary areas are firmly pressed against the wall.
- When pressing the skirting board against the wall, you will notice that some of the adhesive may spill out of the top and out of any joints. Don’t be alarmed. This is normal. Clean away any overspill with a spatula or damp cloth to ensure a clean finish. You may need to repeat this again after a few hours.
Top Tip: Don’t forget to use the correct adhesive, depending on whether you are attaching the skirting board to the wall, or another skirting board.
Watch Orac’s video on how to fit skirting boards
Fixing and installing your skirting board can be as easy as the steps above. Give your interior that finishing touch and look with the installation of a beautiful Orac skirting board.
Here at Wm Boyle, our knowledgeable team would be happy to answer any queries you have about fitting skirting boards. Get in touch today.
Wall Panel Inspiration
Wall panels are both decorative and functional. They are perfect for creating character within the interior of your home. Our collection of Orac wall panels can give your home an instant lift, enriching interior spaces with decorative or simplistic interior mouldings.
Our blog aims to help you decide which style of wall panels best suit your interior, depending on whether you live in a period property or new build home.
Victorian Home Wall Panel Inspiration
Victorian homes are visually and beautifully unique, full of character and open to a world of interior design opportunities. We have some top tips on how to style and emulate the architecture of your Victorian property through the addition of wall panelling.
Enhance your Victorian property with the addition of our sculpted W120 Autoire Wall Panel, this panel will re-capture the era and architecture of your home. It will create depth to any plain wall and can be used vertically or horizontally, creating a stunning wall panel feature in any room. When used vertically, these panels will give the illusion of added height to your room. We’d also recommend combining this panel with W121 plain wall panel to create floor to ceiling panelling. They are very easy to install using glue adhesives.
Our D504 rectangular raised wall panel would also be a great addition to a Victorian or period property as this sculpted panel design will create beautiful panel lines throughout your hallway, living room or master bedroom. This rectangular shaped, plain wall panel can be stuck straight to the wall and positioned between your dado rail and skirting board to create an elegant Wainscoting wall panel design. Wainscoting is perfect for Victorian homes and for decorating long and narrow hallways, offering a touch of aesthetic detail. If you decide this panel design is perfect for you and your design aspirations, we’d suggest that you use this alongside D503 and D507 to create a classic design.
Within our Orac collection of wall panels, we’d also recommend the installation of our P3020A decorative corner wall panel to our Victorian interior. This beautifully ornate corner can be used to create plush panels or ceiling astragal panels. Install our wall corner designs at all four corners of your ceiling and then run our P3020 moulding around the perimeter of the ceiling to create a stunning ceiling band.
Modern Wall Panel Inspiration
A new-build property is like a blank canvas, it creates an opportunity for you to transform your house into a home that is a reflection of you, your character, lifestyle and design aspirations. You’ve not inherited anyone else’s style, and you won’t have the stress of stripping the property back. Everything is new and ready to be decorated. We’ve got some wall panel inspiration that will help you create your dream interior look.
Our SX163 plain wall panel / dado rail would be a beautiful addition to your interior. This contemporary and flat panel design is also multi-functional, it can be used as a dado rail, panel moulding, door architrave or skirting board. This design is perfect for adding character to new built properties, emulating the contemporary and minimalist style. Additionally, this wall panel has a primed finish and is ready to a final coat of paint to mirror your dream interior colour palette.
To give your interior additional flair and 3D dimension, we’d suggest the installation of Orac’s F30 raised wall panelling design. This decorative and recessed wall panelling design adds elegance and style to any room. The F30 wall panel looks beautiful and seamless under a large plain dado rail and can be glued flat to the wall or recessed into the wall.
On the other hand, our PX175 plain wall panel moulding would be the perfect addition to your modern interior. Modern built properties often feature lower ceilings and this wall panel design would help emulate the existing decor and ambience of your interior. This panel is also a great seller in our Glasgow showroom. Give your interior additional detail and design through the installation of a simplistic yet elegant wall panel.
Although we’ve split our wall panel inspiration into two categories, we’ve got a beautiful wall panel design that would suit both property styles: P4025 Autoire wall panel / dado rail. This Orac wall panel / dado rail is a new addition to our lightweight collection. The P4025 is a chunky design and features a sculptured profile making it perfect for use in both modern built and traditional styled homes. It can be used as a simple dado rail, a ceiling astragal or used to create simplistic wall panel design. This design is also available in flexible lengths for curved walls or bay windows.
We’ve given you some inspiration but the final decision is yours. Choose the wall panel that you want, choose the panel that suits your style and character. We’ve got a wide range of beautiful lightweight wall panel designs to choose from, and if you’re still stuck for ideas, give us a call on 0141 429 1218 and we’ll talk you through the designs that would suit your property.
Top 5 Interior Summer Trends
Interior design has always taken inspiration from the natural environment. And as the seasons change, interior design trends also change. From colours to textures, the beauty of interior design is that it tells a story, it allows you to showcase your personality. Just like your wardrobe, you can incorporate seasonal design changes into your home to really make it work for you.
We’ve put together our top 5 interior design trends that are a must have in any property this summer.
- Bring the outside inside
With the longer days and bright summer nights, now is the perfect time to harness natural light and bring a little of the outside inside. Introduce nature into your interior in a variety of ways. The addition of plants or flowers increases the oxygen in your home and contributes to your sense of wellbeing. Whether you are a budding gardener, or looking for something more low maintenance, there are plenty of options. Ideas include window box displays, succulents in quirky pots in your bathroom, a mini herb garden in the kitchen, and a stunning floral arrangement on your dining room table. Pampas grass was one of the most popular interior trends in 2019 and it has continued into 2020 as it gives off a calming vibe and adds a new texture to your room. If you’re not sure that real flowers are for you, why not try some faux-flowers?
Biophilic design takes bringing the outside inside to another level, using direct nature, indirect nature, and space to bring you closer to increase connectivity to the natural environment. It’s said that incorporating elements of nature into our interior can reduce stress, bring down pressure levels and our heart rates. It can also increase our productivity, creativity levels and overall well being. So it’s no surprise that many new office builds are incorporating biophilic design into their modern workspaces. Add this trend to your interior through the use of natural lighting, indoor gardens, living walls, natural and recycled materials such as woods, metal and stone, images of nature and colours which mirror the great outdoors.
Colour schemes inspired by nature are always on trend. This year earthy tones are complemented by olive greens, yellow ochres and burnt oranges. These shades not only bring warmth to your interior but also connect your home to your outside space. If you’re not ready to take the plunge and use these bright colours on your walls or furniture, you can easily incorporate them by hanging a wall print. Floral wall prints are a fun way of adding your personality into your home. We love a bright print as the focal point of a bedroom or dining room.
- Maximalism & pops of colour
Embrace the flamboyant! 2020 has seen a surge in a lavish trend of maximalism to give your home personality. Think clashing patterns, bold designs and contrasting colours. There’s plenty of ways to incorporate this style into your home, including creating a display that showcases bold accessories. Take a bold colour wall, yellow for example, and add vases with tropical prints, colourful picture frames with black and white prints and some quirky bits of furniture for the added wow factor. It’s simple yet effective.
Be brave and cover your walls and floors with bold patterns in contrasting tones, metallic accessories and funky art work to give your room edge. But if you’re not ready to take maximalism to the extreme, start with a simple feature wall in a contrasting colour to your other walls.
Our range of 3D wall panel designs are perfect for making a statement in your home. Providing the wall with an additional dimension and textured finish, they create a focal point to give your room an extra wow factor. Go bold with a modern geometric style, or opt for something more intricate to complement a period home. View our design collection here.
- White interiors
When it comes to interiors, keeping it classy and neutral is the perfect way to create a timeless design. White brightens up every space and makes even the smallest room feel bigger. However, this can be an intimidating design trend to bring into a home, especially a family home! But there are plenty of materials and fabrics that are stain resistant and cleanable. Accent white rooms with dark woods and natural tones to create a calming atmosphere. An elegant white interior could benefit from the addition of Luxxus Coving and cornicing to finish off your classic and stylish room decor. We offer a range of high quality coving designs suitable for all property styles, view our range here.
- Nautical designs
Every summer we see a resurgence of nautical inspired colour palettes. Blues, greys and whites are the perfect colours for summer. Add reflective elements to your room with an ocean styled mirror. Add natural textures in a nautical theme to break up your original colour palette. Be bold with your interior and add distressed woods and dark colours to give your interior a laid back vibe.
- Garden style
We’ve all had a taste of sunshine this year, and with the summer holidays ahead, now is the perfect time to spruce up your garden space and prepare to enjoy your time outside in style.
Make the most of your garden, whether it’s to allow you to dine alfresco, host socially-distanced garden parties or enjoy your own space with a book or a glass of wine, we’ve got some great tips to share.
With the addition of lighting and heating you’ll be able to enjoy the outdoors all day long. Simply install some pretty hanging lights on your fence to make your garden really shine and give it an authentic beach vibe. A must have in any garden is an open fire pit, the warmth and flames allow you enjoy the rest of the night as the temperature dips. Another way to transform your garden is through outdoor furniture and it can be low-cost. Simply layer up your chairs with throws and cushions, they’re perfect for adding colour and warmth for when the sun fades away.
Give your home a fresh look this summer, whether you decide to add a pop of colour or completely redesign your décor, we’ve listed some great ideas that will help you. And if you’d like to add any coving, cornices, ceiling roses or wall panels to your interior whilst you’re redecorating, we’ve got a fantastic range of lightweight products.