Lightweight Mouldings
Lightweight MouldingsExterior Mouldings
Exterior MouldingsPlaster Mouldings
Plaster MouldingsFireplaces & Stoves
Fireplaces & StovesCast Iron Radiators
Cast Iron RadiatorsFREE delivery on online orders over £200 from lightweight range

Company


Inspiration

Help & Advice

Special Offers
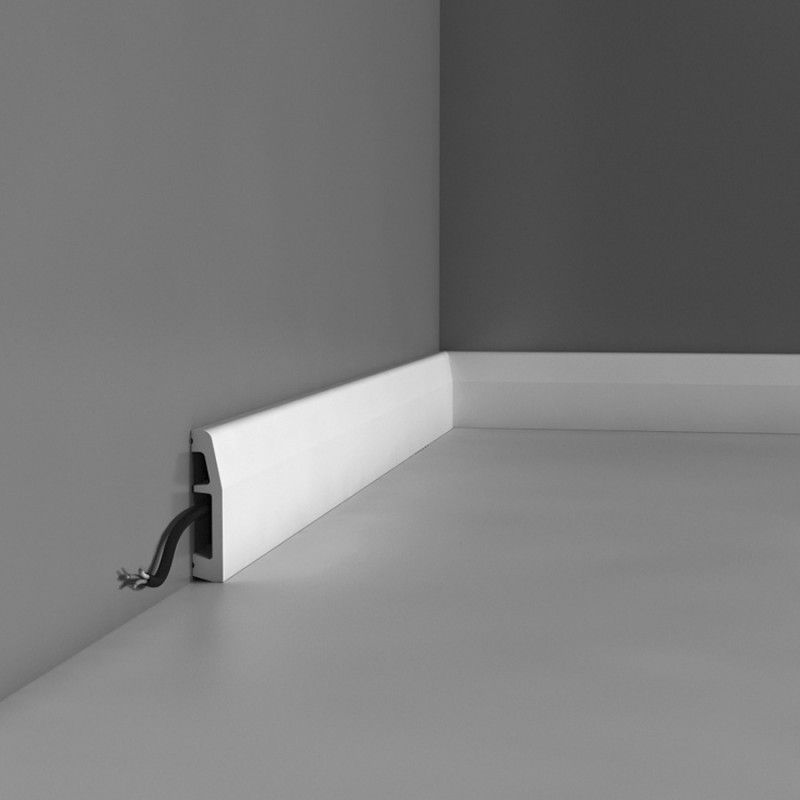
Skirting boards are used to provide a neat finish to your walls and protect floor-level plaster. Our range of white Orac skirting boards is easy to install and finished with a white primer ready for a final coat of paint.
Made from lightweight duropolymer, these skirting boards come in a variety of sizes and styles, catering to all homes including traditional Victorian terrace homes as well as those slightly more modern houses and apartments.
Our Orac skirting boards are made from lightweight duropolymer materials, meaning that all you need to attach the skirting to the wall is adhesive. They are waterproof, shockproof and impact resistant, making them a great choice for modern-day homes.
For a long-lasting and high-quality result, we recommend following our step-by-step instructions below. Whether you’re replacing existing boards or giving your interior that final touch with the addition of skirting boards, we’ve created a step-by-step guide to help you fix your skirting boards to the wall.
As well as showing you how to fit and install skirting boards, in this article, we will also show you how to cut your skirting to size, measure and cut angles for skirting corners and how to apply skirting adhesive.
Before you get started, we recommend storing your skirting boards and adhesives at room temperature and waiting 24 hours before installing them.
We would also suggest making sure that your walls are ready by checking the following:
If the answer to all the questions above is yes, then your walls are ready and you can start.
Before you start fixing your skirting to the walls, you need to measure and then cut your skirting to ensure it fits perfectly against your wall and interior space. Don’t forget to calculate the angle of your wall corners as you’ll need to create internal and external corner joints as well. Internal corners face inwards, and external corners outwards.
In order to create your corner joints, use your protractor, measure the angle and if, for example, the skirting corner angle is 90 degrees, cut 2 45-degree angles.
Trade Secret: To ensure your measurements are correct, use a protractor, ruler, and pencil to mark your angles and a mitre box to cut.
Most of our skirting boards come in 2m lengths. Therefore you’ll need to measure your walls to calculate the skirting lengths required and cut the skirting boards to the required lengths for shorter sections. You’ll also need to calculate the angle of any corners and cut the ends of your skirting boards to create the required internal and external corner joints. Internal corners face inwards, and external corners outwards, as shown in the images below.
Product shown: SX125 Small Contemporary Skirting Board

Product shown: SX118 Skirting Board
When installing the skirting boards we recommend starting at the lefthand side of the door and working your way around the room in an anti-clockwise direction.
Follow the steps below for each length of skirting required.
Top Tip: Although we assume that all room corners are 90 degree angles, in reality this is not always the case and measuring corner angles is an important part of fitting skirting so don’t skip this step!
Example: 90 degree corner (as shown below)
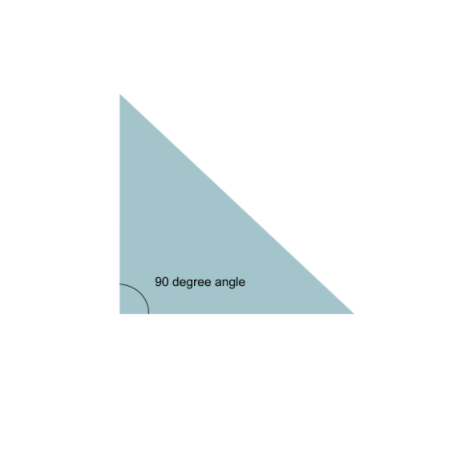
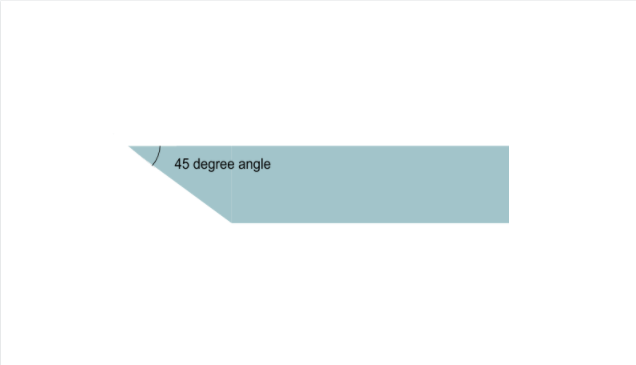
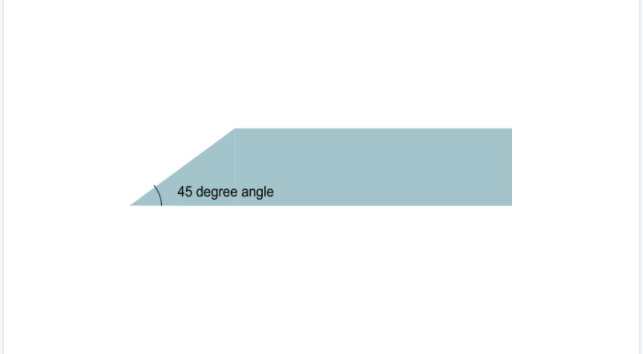
A 90-degree wall corner will require each board to be cut at an opposite 45-degree angle, as shown below:
Angle 1 (top of board view)
Angle 2 (top of board view)
Top Tip: When cutting a long length of skirting, support the board at the end you’re not cutting, to ensure it is level with the base of the mitre box as you cut.
Unlike traditional wooden skirting boards, Orac skirting boards are made of a lightweight duropolymer meaning that you don’t need screws to fit and attach your skirting boards to the wall. The best application and finish will come from using adhesives.
There are various adhesives available to fit Orac skirting boards. You will need two adhesives to attach your skirting boards – one to fix the skirting boards to the walls, and one to join two skirting boards together e.g. for joints and corners.
Here are the types of Orac adhesives which we would recommend choosing from as the best way to attach your skirting boards. Each adhesive comes in various sizes to meet the needs of your project.
Using adhesive, and following the instructions shown, is what we see as the best way to attach skirting boards to the wall.
Top Tip: Don’t forget to use the correct adhesive, depending on whether you are attaching the skirting board to the wall, or another skirting board.
Fixing and installing your skirting board can be as easy as the steps above. Give your interior that finishing touch and look with the installation of a beautiful Orac skirting board.
Here at Wm Boyle, our knowledgeable team would be happy to answer any queries you have about fitting skirting boards. Get in touch today.

5th June 2025
Our Glasgow showroom will be closing for summer holidays during the dates below Closed from Friday 27th June and Re-open...
Summer Holiday – Glasgow Showroom
4th June 2025
Using Wall Panels in Modern Interior DesignYou've selected some products for comparison. Click here to compare the products you've selected.
View Products")
")
")

")


