")
")
")

")


Contemporary door architrave
WM Boyle has a modern door architrave to suit every type of home. Our range of lightweight Duropolymer door surrounds are easy to install, available from stock and can normally be delivered straight to your door within 2 - 4 working days. The type of decorative door surround you choose can help you add your own personal touch to your interior and really set a room apart from the rest. We offer a selection of sleek contemporary door architraves that can perfectly complement your interior, for a simple yet elegant design, to an opulent eye-watching profile, to create that ‘wow’ factor. [read more]
FAQs
What is a door architrave? Architraves are interior mouldings that are commonly featured in most homes, corporate spaces and other buildings. A door architrave is designed to fit around your door to hide door joints, and other surfaces, in a sleek and seamless manner. The door mouldings will act as a trim where the door joints meet the wall and floor. Door architraves come in a range of different materials and finishes. Get in touch if you need advice on which decorative door surround best suits your interior. How to fit a door architrave? Step 1 Using a measuring tape and pencil, make a chain of marks 6mm from the inner edges of the door lining around the full circumference of the doorway, excluding the bottom edge. Join up the marks using a spirit level. Top tip: Don’t worry if it’s not vertically straight, it’s more important the architrave is joined correctly at the corners. Step 2 Starting with the headpiece of the door moulding, measure the distance between the intersections of the doorway, and mark the length onto the inner edge of your architrave, remembering to leave space for the mitre cut. Step 3 Using a mitre box and saw, place your architrave flat side down and cut a straight line at a 90 degree angle, from your marking to the corner of your architrave, on both ends, at opposing directions. Lightly sand until smooth. Top tip: It’s recommended to lightly line the intended direction of cuts before, to minimise confusion. Step 4 Apply our adhesive to the back of your headpiece architrave and carefully along the prepared line, 6mm from the door lining. Hammer four equally separated 40mm lost head nails through the architrave into the door casing, for extra security. Step 5 Measure the distance between bottom edge of headpiece to floor and mark on two sections of your architrave, which will act as your side pieces. Repeat Step 3, on both side pieces, remembering the bottom edge should remain square, to fit against the floor. Step 6 Apply our adhesive glue to the back of your side pieces, and edges of the headpiece, and carefully fix into position along the pencilled line. Again, hammer 40mm lost head nails for extra security, on both sides. How to mitre door architrave? First measure the distance between intersections of the doorway, for your headpiece, or from your headpiece to the floor, for your side pieces, and mark on your door architrave, leaving room for the mitre cutting. Place one side of your architrave, flat side down into your mitre box and cut a 45 degree angle from your marking to the corner of your architrave, using a saw. Repeat on the necessary sides of your three architrave pieces, so the two side pieces perfectly slot with headpiece and floor. [/read]Items 7
Sort by
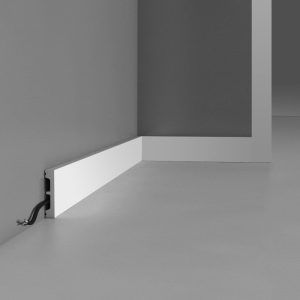
DX157 Plain Door Architrave / Door Coving
L 230 x W 6.6 x P 1.3 cm
Duropolymer®
Plain, lightweight, contemporary door architrave.
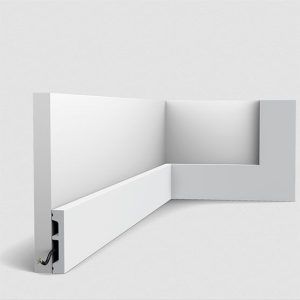
DX163 – Contemporary Door Coving
L 230 x W 10.2 x P 1.3 cm
Duropolymer®
Plain, lightweight, contemporary door architrave.
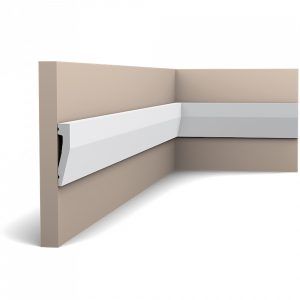
SX159 – Plain Dado & Picture Rail / Architrave
L 200 x H 6 x P 1.2 cm
Duropolymer®
Plain, contemporary style dado rail / door architrave
DX170 Large Plain Door Architrave
L 230 x W 11.9 x P 3.2 cm
Large plain, classic style door architrave.
Pric...
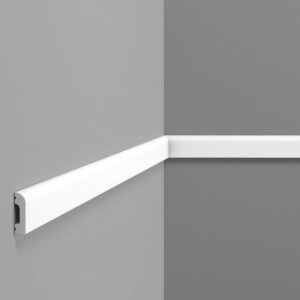
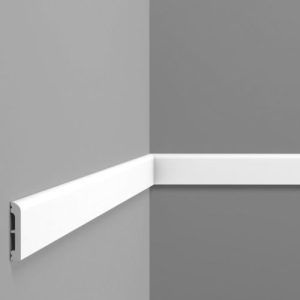
SX182 Contemporary Dado Rail / Architrave
L 200 x H 5 x P 1.3 cm
Duropolymer®, Flex®
Small, contemporary style dado rail / wall panelling / door architrave
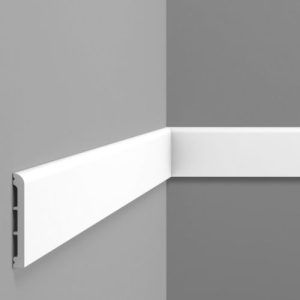
...£11.26 – £45.07 Learn moreSX183 Modern Dado Rail / Architrave
L 200 x H 7.5 x P 1.3 cm
Duropolymer®, Flex®
Medium sized, modern style dado rail / wall moulding / door architrave
£16.00 – £63.96 Learn moreSX184 Contemporary Dado Rail / Architrave
L 200 x H 11 x P 1.3 cm
Duropolymer®, Flex®
Medium sized, contemporary flat dado rail / wall moulding / door architrave
£22.54 – £90.16 Learn more