Lightweight Mouldings
Lightweight MouldingsExterior Mouldings
Exterior MouldingsPlaster Mouldings
Plaster MouldingsFireplaces & Stoves
Fireplaces & StovesCast Iron Radiators
Cast Iron RadiatorsFREE delivery on online orders over £200 from lightweight range

Company


Inspiration

Help & Advice

Special Offers
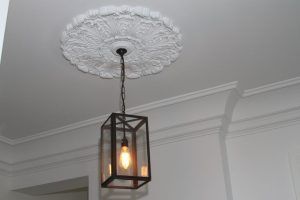
A ceiling rose is a popular architectural piece that can frame and highlight a light fixture, creating a focal point within your room. As well as being easy to install, the ceiling rose is just as easy to remove or replace, making it an extremely diverse and interchangeable addition to your home.
Below we have detailed what you’ll need, and step-by-step instructions on how to install one of our lightweight ceiling roses by yourself.
Top tip: Your lightweight ceiling rose can be painted before or after installation to match your decor.
The first and most important step is to make sure that the electricity is switched off at the mains before you begin removing your light fixture.
Then you must prepare the ceiling for installation. Take down any existing light fixture, and remove any old wallpaper, paint, grease or dirt from your surface. For best results, sand the surface where your rose will be, with a 120-grit sandpaper pad and hand sander, (please handle with caution, and wear a ventilation mask when sanding!), then wipe down with a tack cloth.
If you’re replacing a ceiling rose, you’ll need to first remove the existing one from your ceiling. Again, please switch off the electricity and the mains beforehand, and remove the light fixture.
Take a utility knife and cut a shallow score all the way around the decorative piece, then direct the leading end of a putty knife blade to the edge of the ceiling rosette, and slot in the gap between the ceiling and rosette. Tap the putty knife with a hammer to push the blade under the rosette, and repeat all around the circumference. Repeat to the centre of the rosette, until it is loose enough to pull off.

With your newly purchased ceiling rose, drill a hole in the centre of the rose with an electric drill, big enough so the electric cord can fit through. Then, with the help of a ladder, hold your ceiling rose into place and draw round the outline with a pencil (this will be much easier if you have an additional person to hold the ceiling rose in place). Finally, if possible, find where the ceiling joists are with either a stud finder, or professional electrician.
Set the ceiling rose, face down on a large table and apply one of our easy-to-use adhesive glues to the centre of the rose, and spread evenly with a notched spreader, whilst leaving a 5cm gap around the edges.
Take the rose to the ceiling, place it within your pencil marking, thread the electrical cord through, then push and hold with force for around three minutes. For extra security, with your electric drill, screw plaster screws through your ceiling rose to your ceiling joists, then wipe down any excess adhesive before leaving to dry.
Top tip: Take a caulking gun and spread around the edges in a colour that matches your rose, to make the rosette more coherent and seamless with the ceiling.
Lastly, we would recommend waiting around 24 hours before reattaching your light fixture.
At WM Boyle we have a range of Plaster and Lightweight ceiling roses that come in a variety of aesthetic styles, and are super easy to install. Our traditional plaster ceiling roses have an authentic period-style finish, but are heavier so will need slightly more pressure and secure fixing when installing, whilst our lightweight ceiling roses, with intricate details, are made of high-quality, lightweight, polyethylene materials so exceptionally easy to install.
If you require any guidance to decide what type of ceiling rose would suit your property and style, we will be more than happy to offer our advice. Contact us and we will find the perfect ceiling rose for you and your home.
View our full lightweight ceiling rose range here.
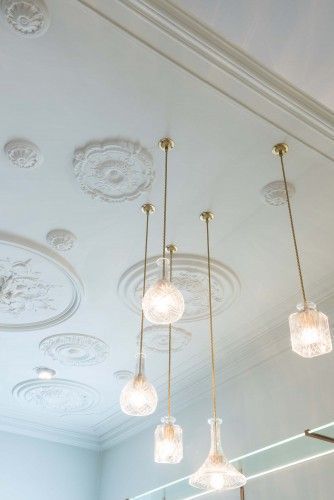
Yes! Ceiling roses have made a strong comeback in interior design, particularly in period properties, such as Victorian and Edwardian homes. Modern homes can add a lot of character to their rooms. They complement high ceilings, chandeliers, and decorative lighting, aligning with trends like maximalism and classic revival styles. Sleek, minimalist designs are also popular for contemporary interiors.
The ideal size depends on the room’s proportions and ceiling height. As a general rule:
A ceiling rose should complement, not overpower, the space and light fixture.
Typically, no. By the 1930s, interior design moved towards simpler, more streamlined aesthetics, with fewer decorative mouldings. However, some upscale homes or those blending earlier styles may have had modest ceiling roses. Many homeowners today add them to 1930s houses for a more traditional look.

27th May 2026
Glasgow Showroom Summer Holiday Closures Please note that our Glasgow showroom will be closed for summer holidays on the following...
Summer Holiday – Glasgow Showroom
13th May 2026
We are delighted to announce that we are now stockists of the beautifully crafted NOËL & MARQUET range of coving,...
Noel & Marquet CollectionYou've selected some products for comparison. Click here to compare the products you've selected.
View Products


")


